


Hello.
For this month I have assembled the HQ choice for my Tyranid army: The Hive Tyrant. On this article I’ll share with you a step by step on how it was done.
Now that my color scheme has been defined and tested painting this figure was really easy. Applying light and shadow to a big piece such as this is different from a small piece and might present a challenge such as on this model.
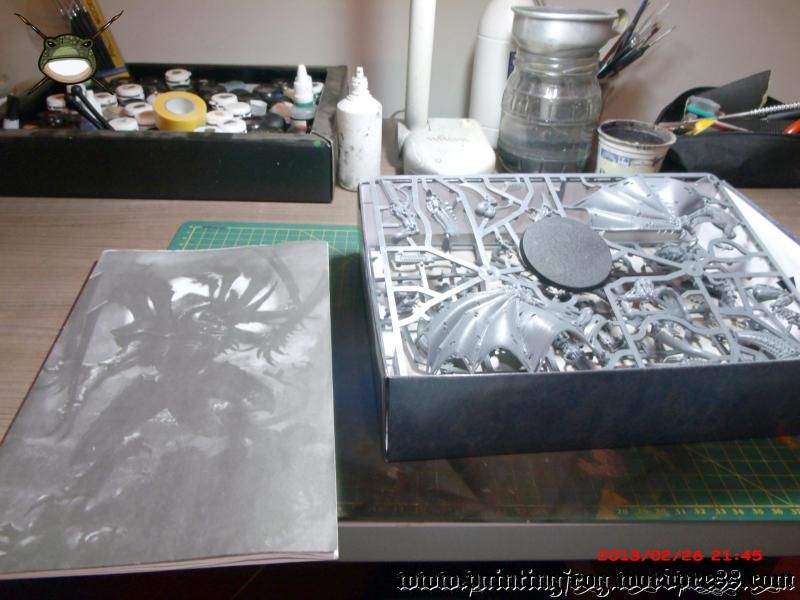
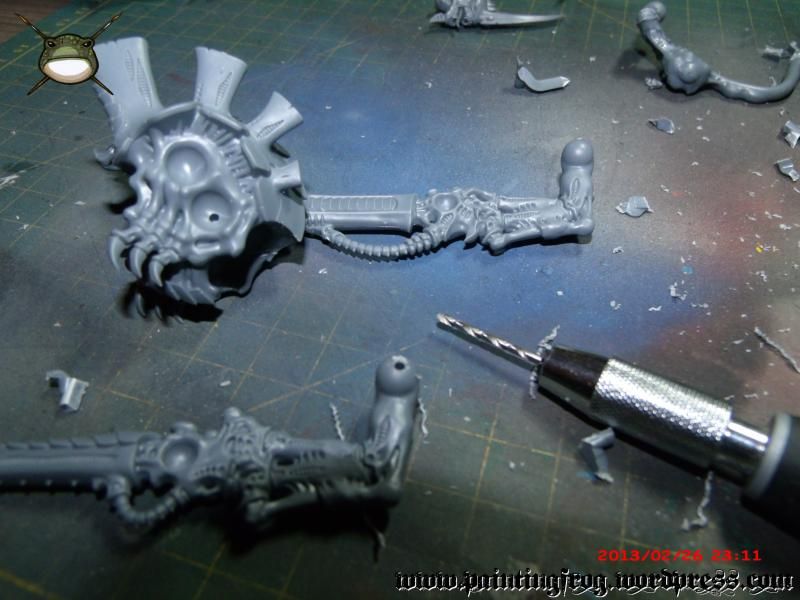
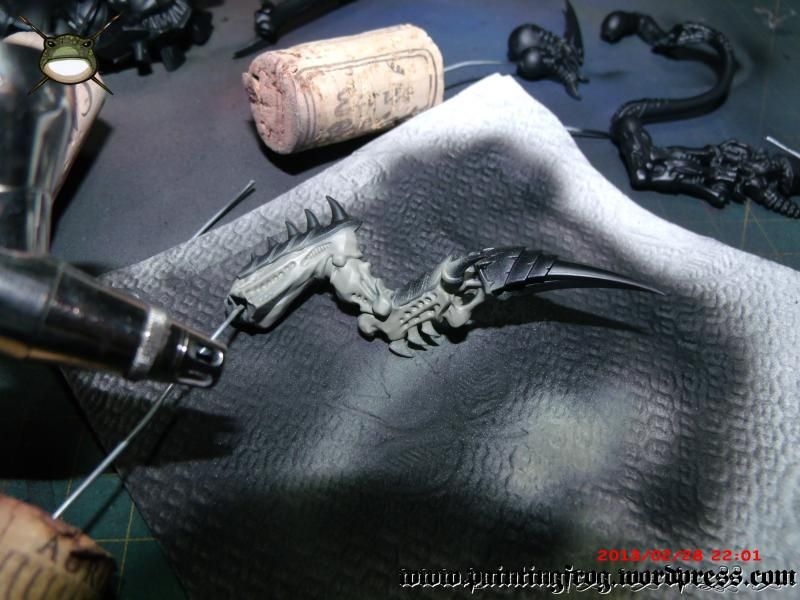
I began by studying the assembly manual and the sprues. An important step in order to plan the paintjob ahead of time.
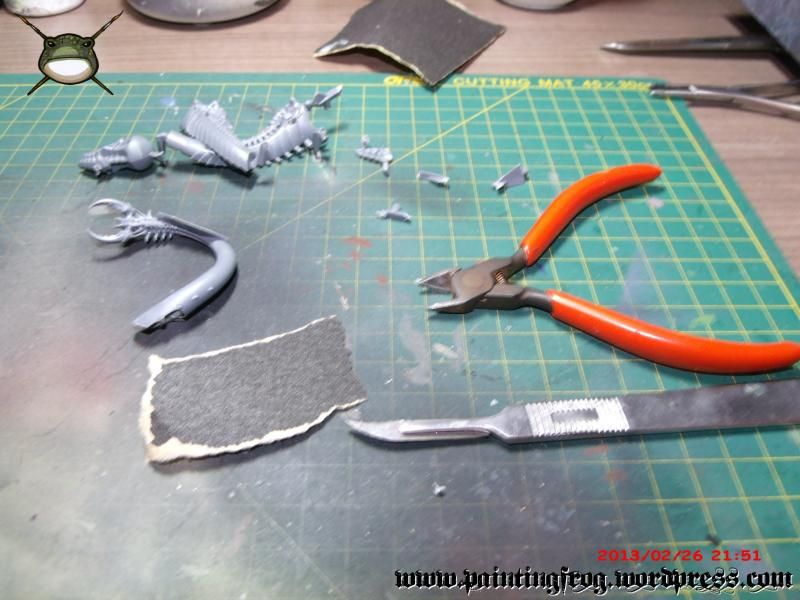
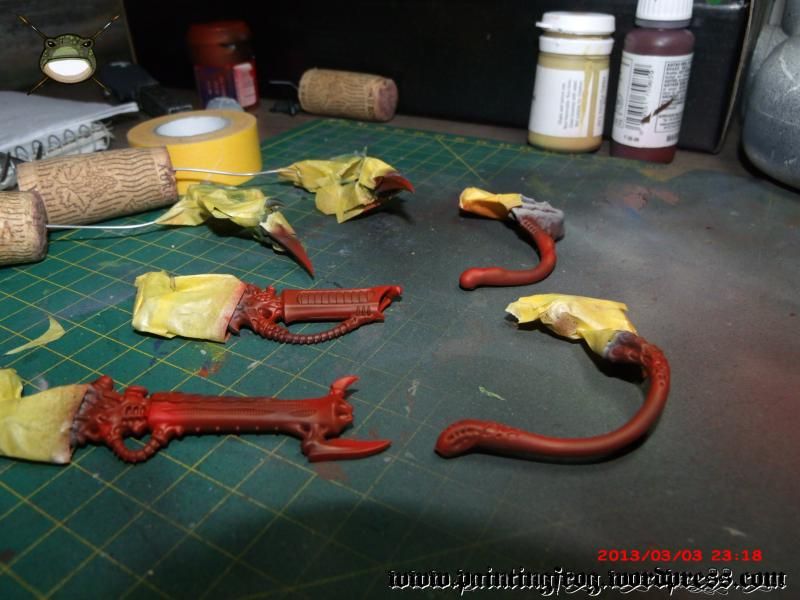
I remove the parts from the sprue following the sequence from the manual using a scalpel to remove the mold lines and a file for touching each piece up.
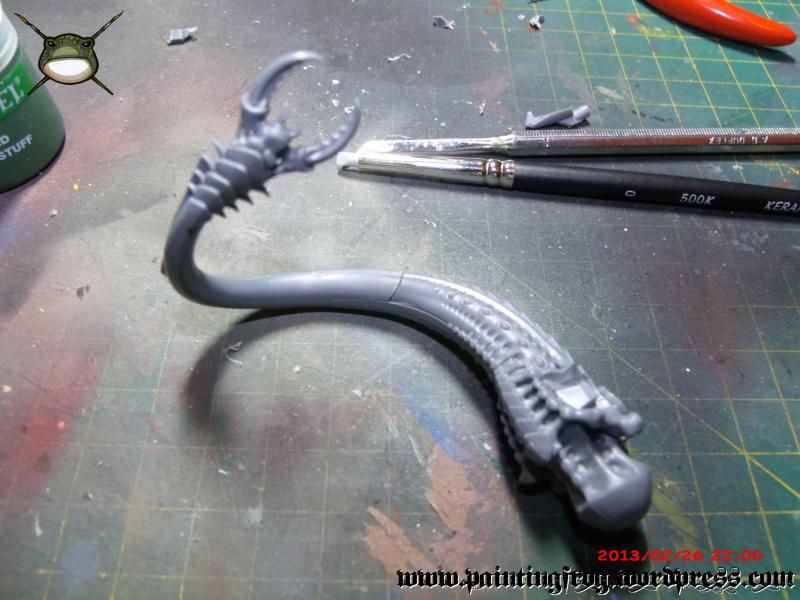
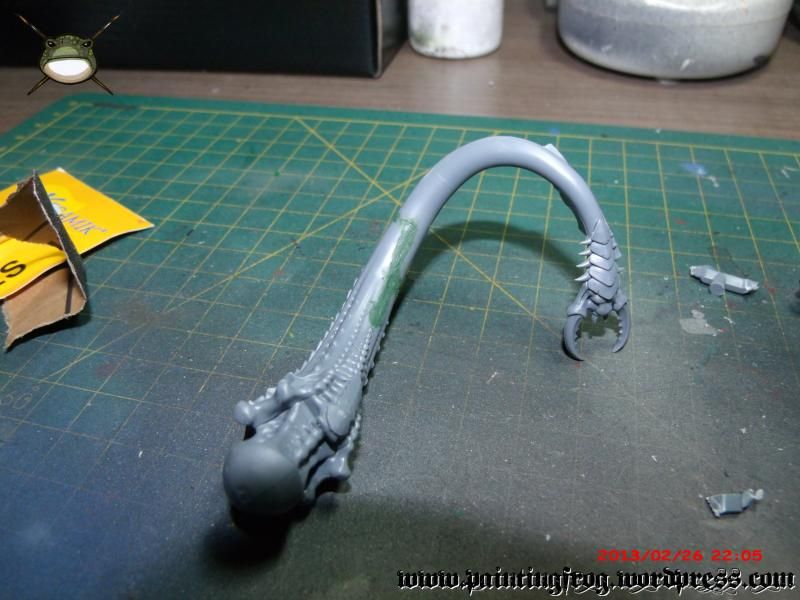
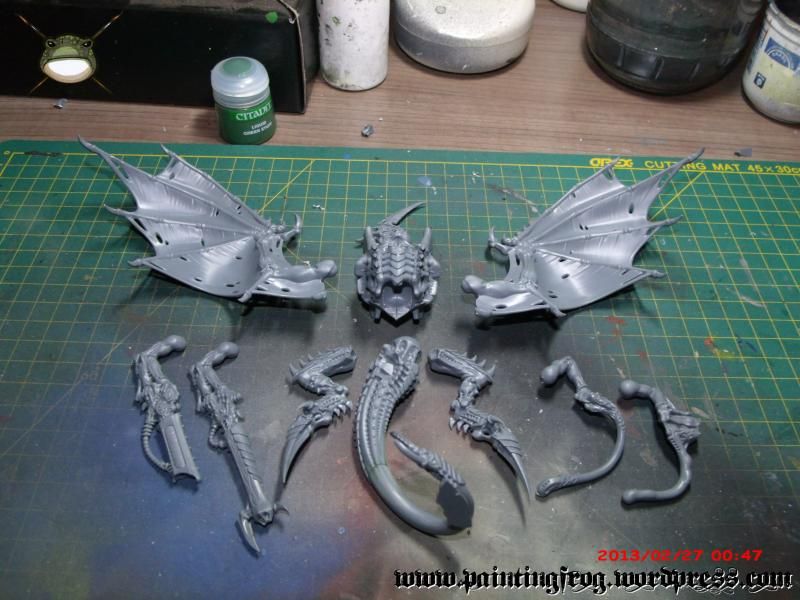
After assembling the parts there might be some gaps left between them so we use greenstuff to fill them. After it dries I file it down to blend it in. Despite knowing all theory behind this process I have a lot of trouble to do it. On this particular case I needed a file with finer grain. I also don’t assemble a figure completely before painting as I find it easier to paint it in parts.
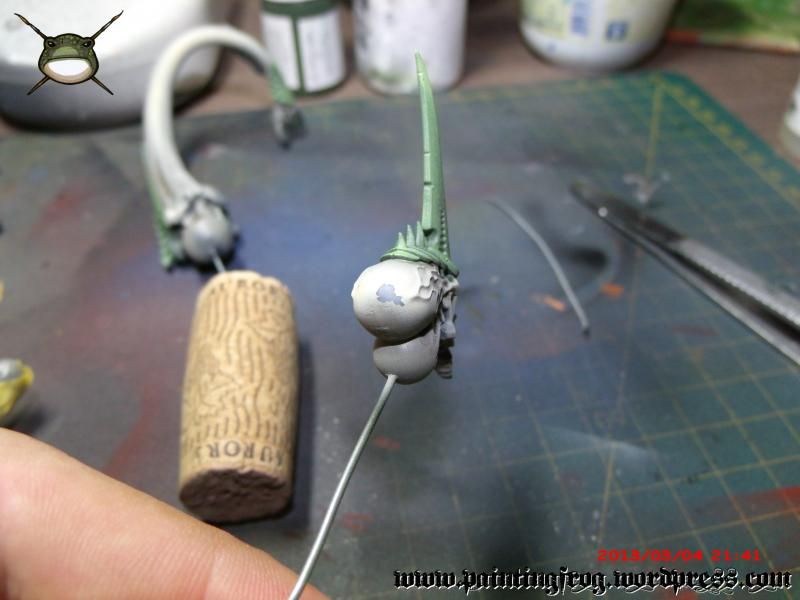
After the assemblage I magnetized some parts. It is a pretty simple task. I begin by drilling a guide hole and then proceeded to make a larger hole to accommodate the magnet using a 2mm drill bit. You must be mindful about the polarity of the magnets and we should also strive to have a pattern on multiple figures so we can swap weapons between them. You can even do that to finished figures.

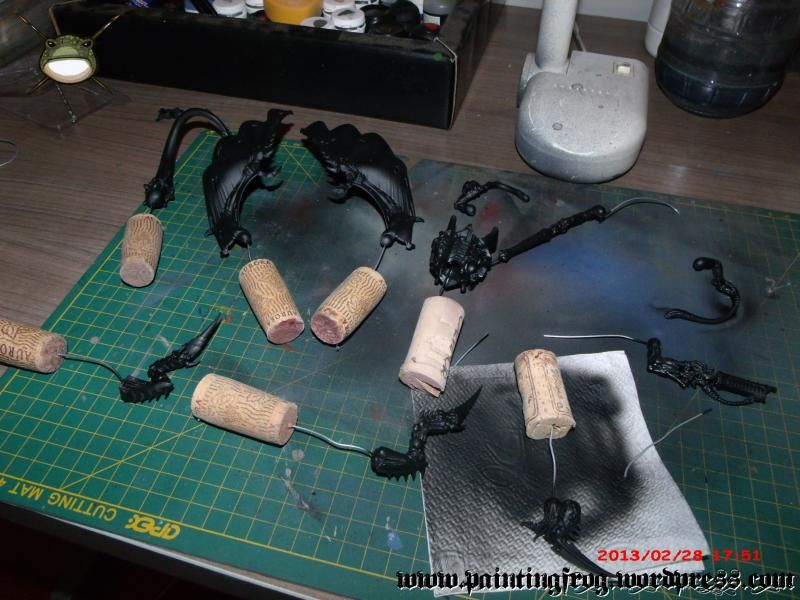
After we’re done the parts are fixed to metal rods so that we have somewhere to hold them when applying the primer.

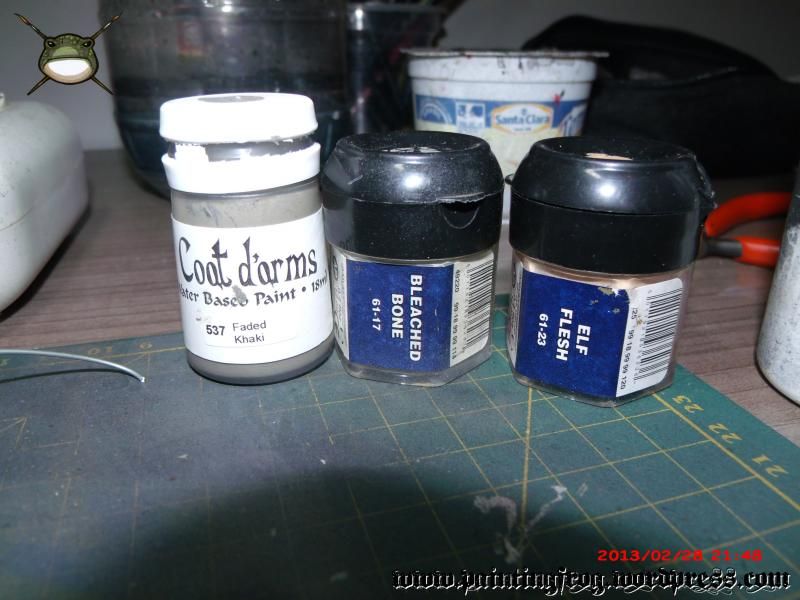
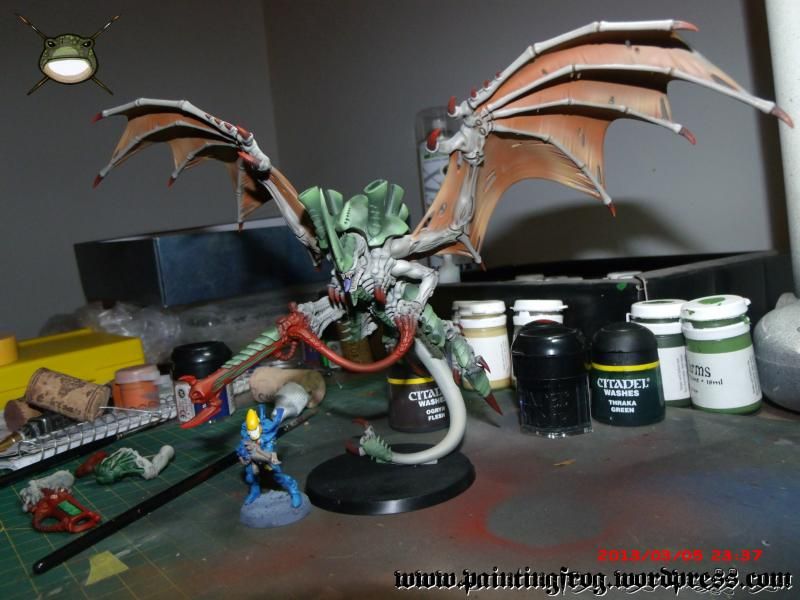
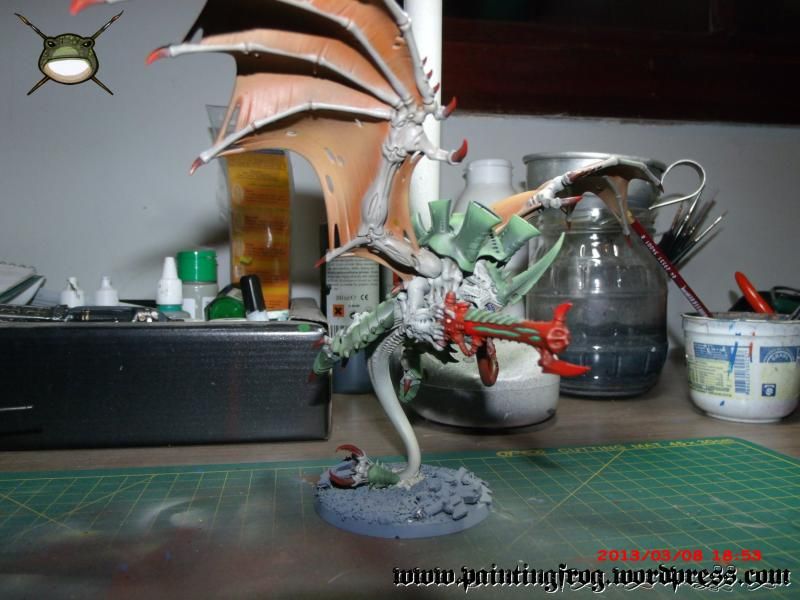
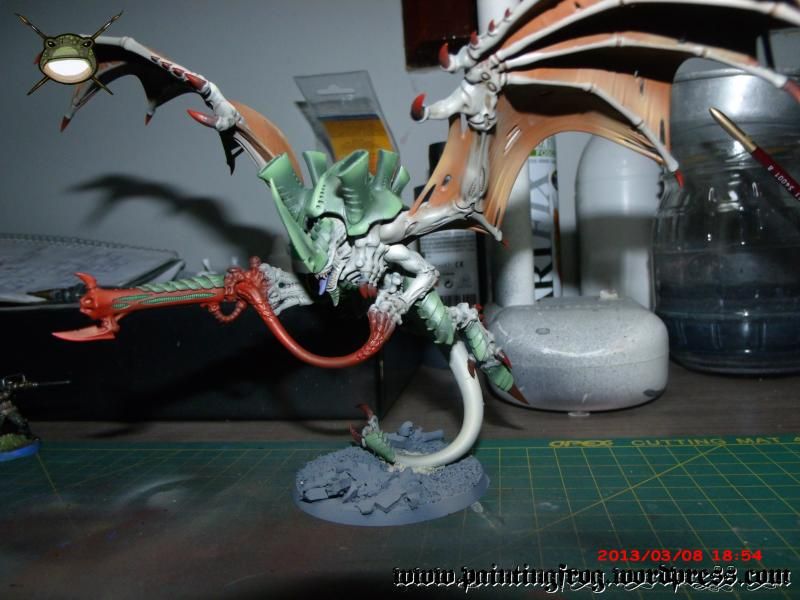
We begin painting by applying a Vallejo primer using the airbrush. After that I began working on the skin in which I used the same patterns I’ve been painting my other figures with: Faded Khaki, Bleached Bone and Elf Flesh. The base color is done usinf Faded Khaki, followed by an Agrax Earthshade wash. After that dries I apply a Faded Khaki + Bleched Bone highlight followed by another pure Bleached Bone highlight and finally a mix of Bleached Bone and Elf Flesh to wrap it up.
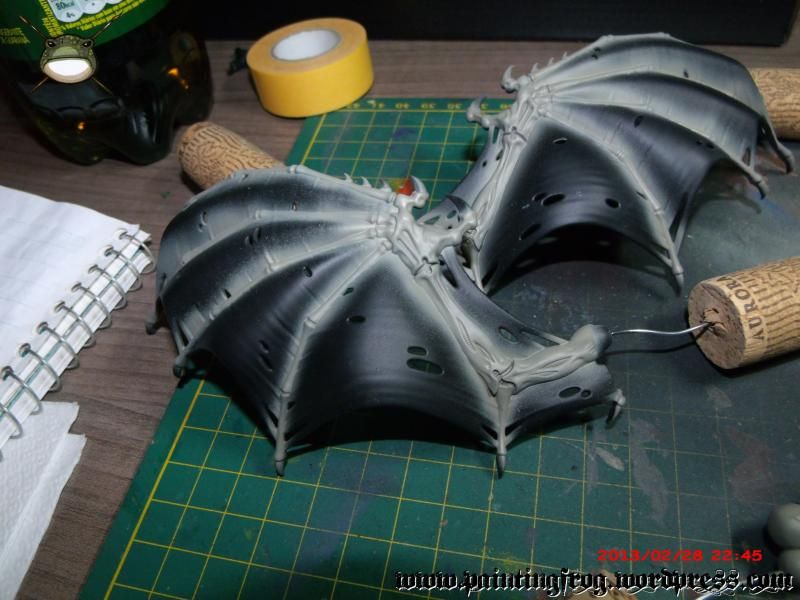


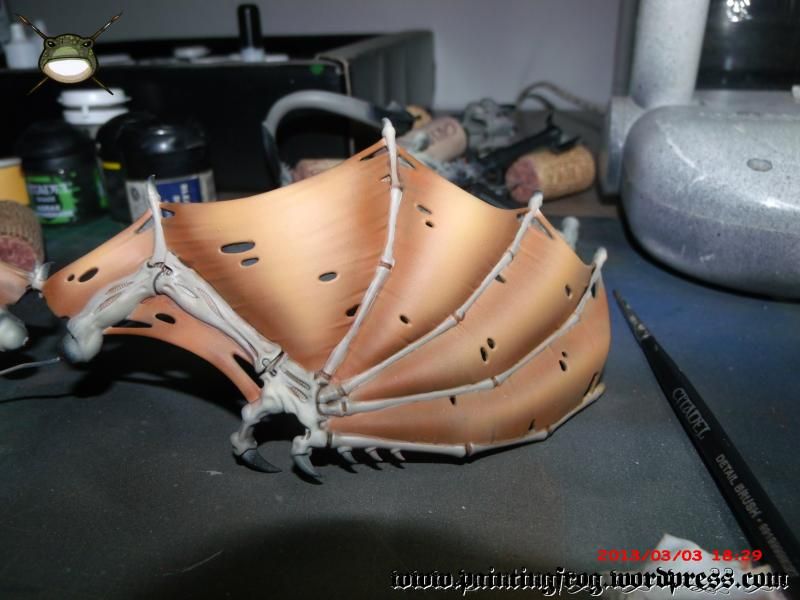
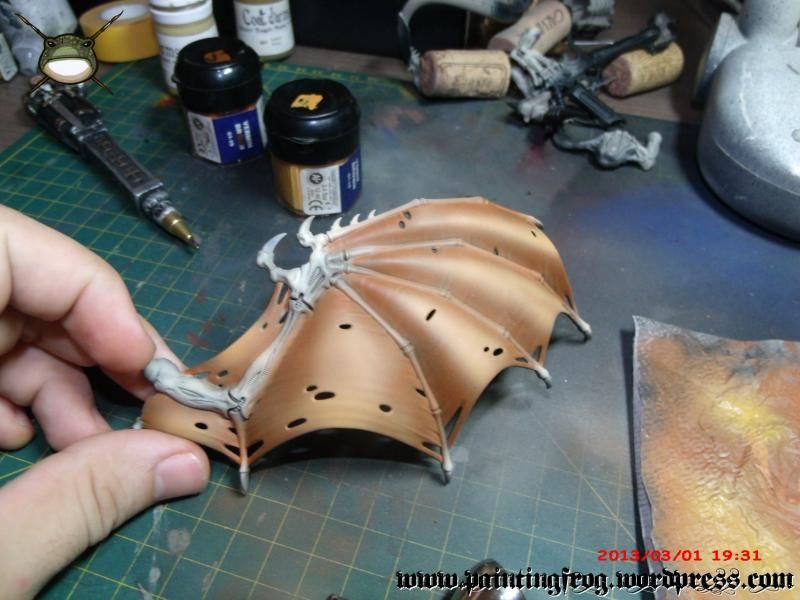
On the figure’s wings I used Vomit Brown and Vermin Brown. I had to re-do the fingers using a paintbrush as when I was using the airbrush I couldn’t find a way to mask the fingers on the wings.

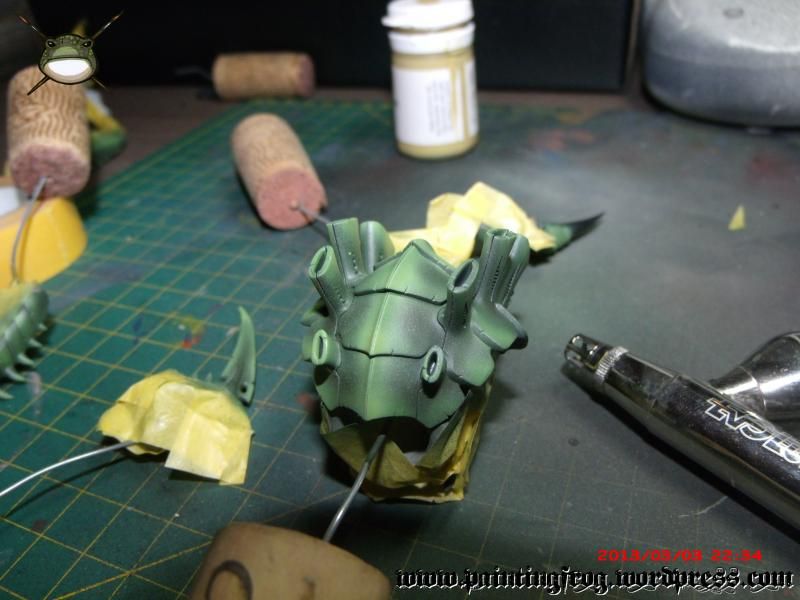
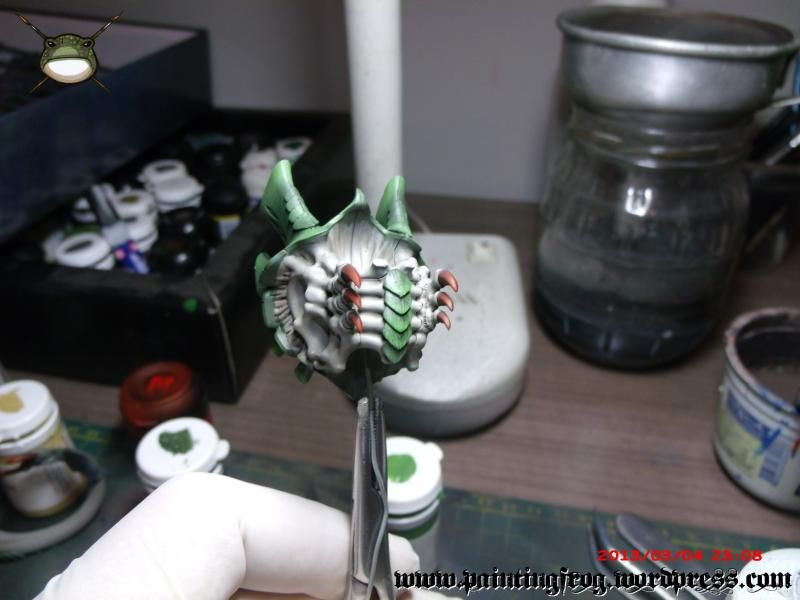
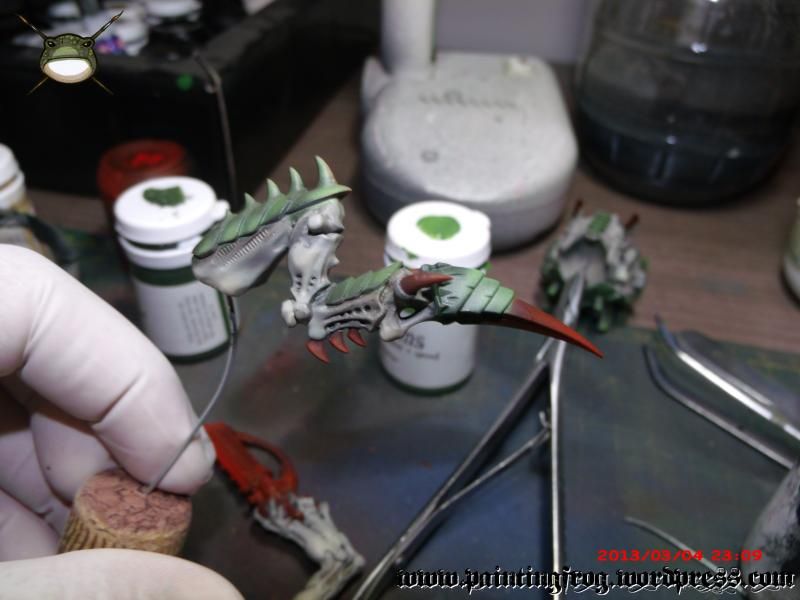
I mask the other parts in order to paint the carapace. I stuck to my tried recipe once more using Army Green; a mix of Army Green and Camouflage Green; pure Camouflage Green; a mix of Camouflage Green and Desert Yellow and pure Desert Yellow.

For the weapons I used Hull Red and Blood Red. We can use a mix of Oxford Blue and Blood Red for a shade but I didn’t use it this time.
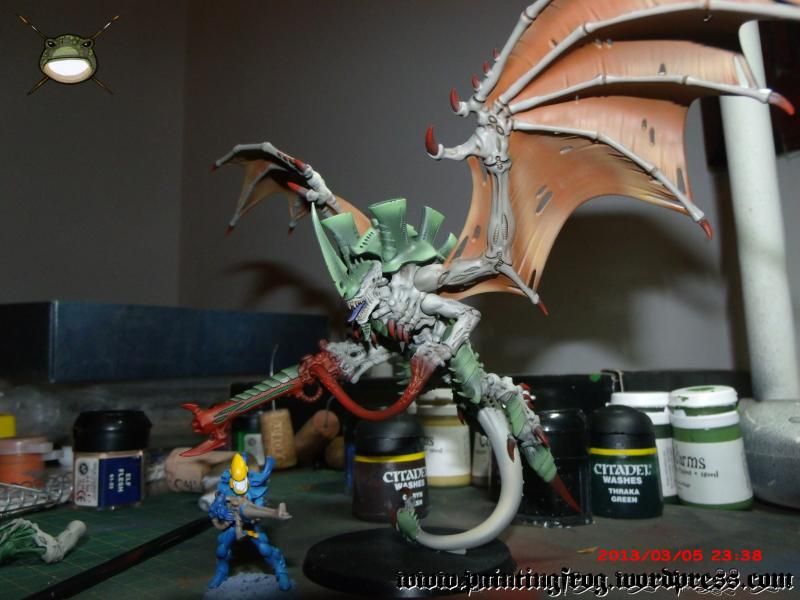
When I removed the masking tape some paint got loose. I wouldn’t know how to explain this but if I had to guess I’d say it was because I removed the masking tape in a rush. I had to repair the affected areas with a paintbrush and this is where I wrapped up using the airbrush.
Small detail are painted using the paintbrush following the established painting patterns from my other figures.
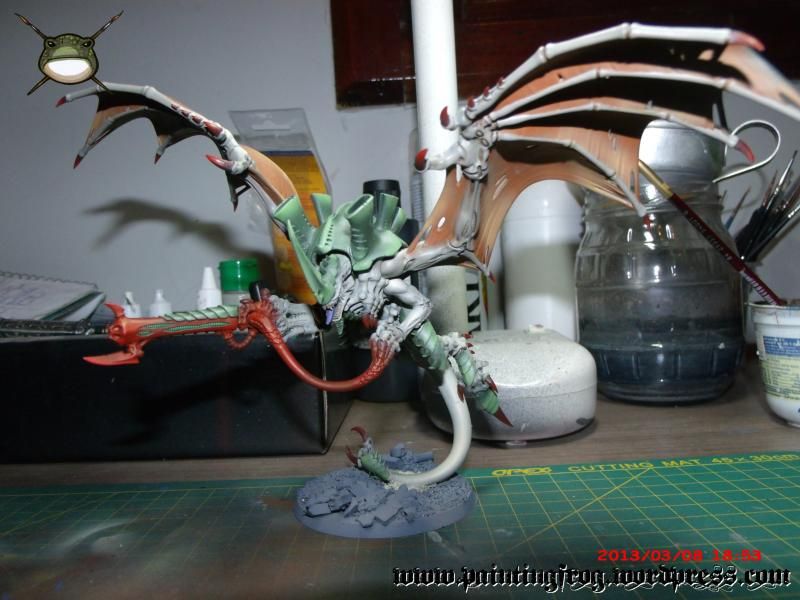
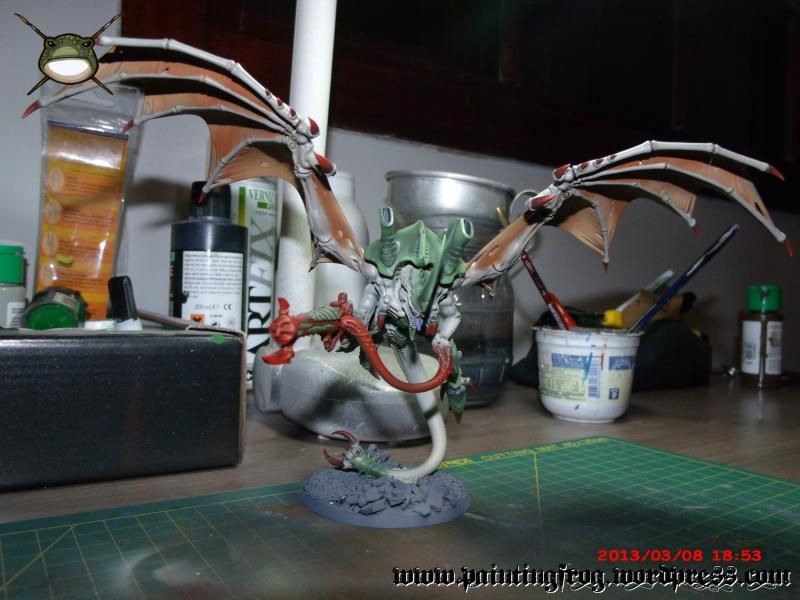
Here we have the assembled piece. I used to superglue to glue the parts together.
While building the base for the figure I made a mistake which irritated me a lot. I wasn’t able to fit the miniature properly on the space I left for it, and wasn’t able to repair it properly. The pins I made wouldn’t fit the holes on the base and in order to level everything I had to use greenstuff. To add insult to injury in a moment of distraction I drilled the Tyrants tail.
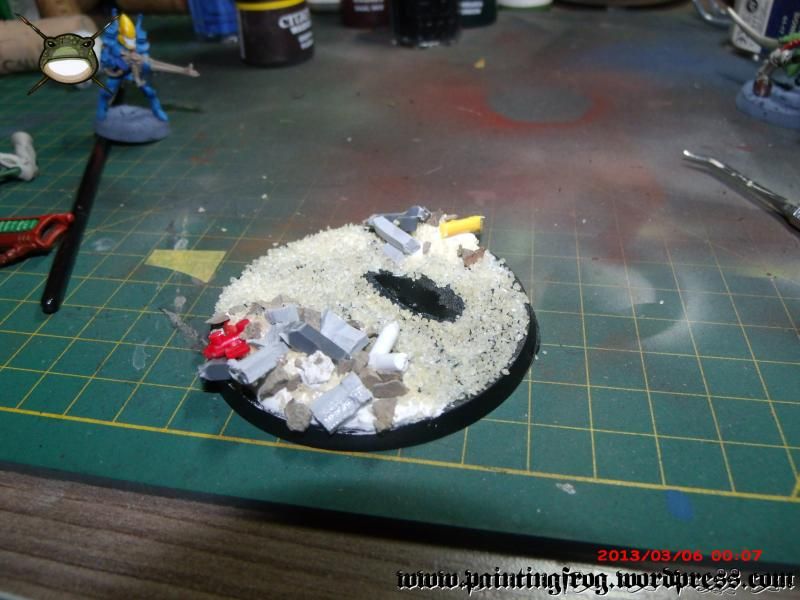
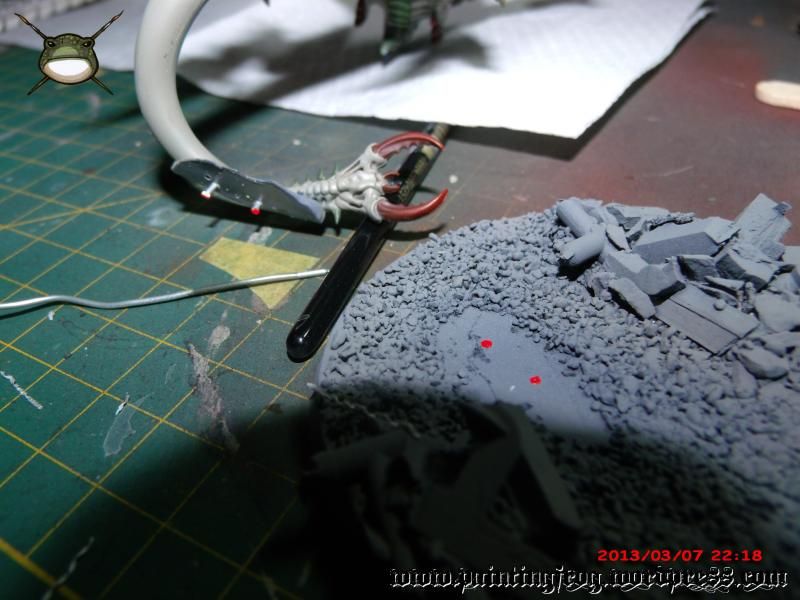
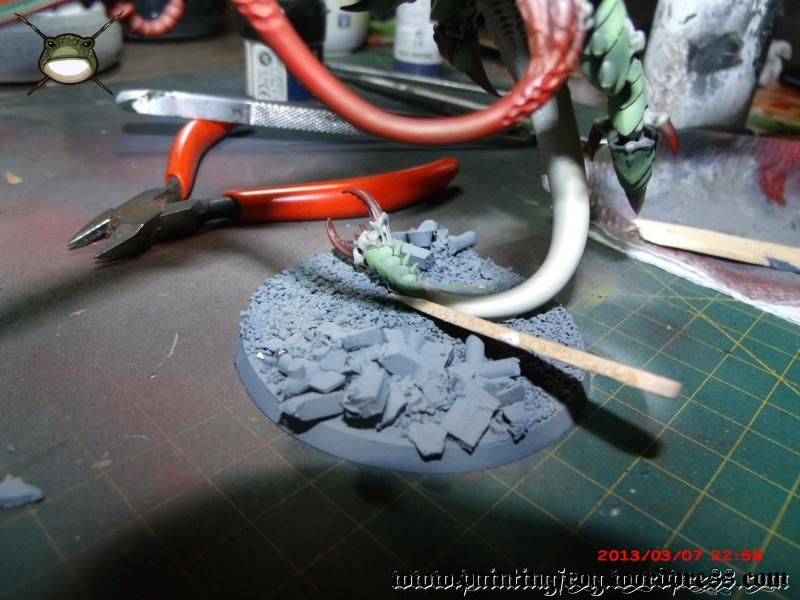
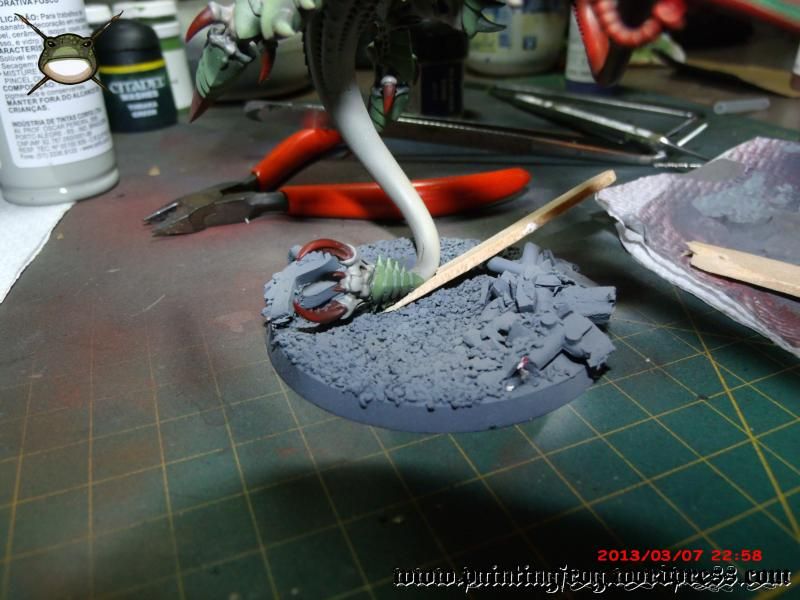
I fixed that using liquid greenstuff and painted over it. I added more sand to the base in order to cover the repairs I did and painted it all grey using a paintbrush.
And here’s the completed Winged Hive Tyrant.
A hug to all of you and see you soon. Remember this is the latest part in a series of articles published here on The Painting Frog. You can click the links to check part 1, part 2, part 3 and part 4.
+++
Olá!
Esse mês eu montei o HQ do meu exército de Tyranids, o Hive Tyrant. Nesse artigo eu vou mostrar o passo a passo de como ele foi feito.
Agora que o esquema de cores já está definido e testado, a pintura dessa figura foi bastante fácil. A luz e sombra de uma peça grande é um pouco diferente de uma peça pequena, e pode representar um desafio, como foi o caso desse modelo.
Bom, iniciei dando uma estudada no manual e nas grades, etapa muito importante para se fazer o planejamento da pintura.
Eu removo as peças seguindo a sequencia do manual, e utilizo um bisturi para tirar as linhas de molde e uma lixa para fazer o acabamento.
Após a montagem das peças pode ficar algum “gap”. Então utilizamos greenstuff para fechar esses espaços. Depois de seca damos uma lixada nela para regularizar a área. Apesar de saber toda a teoria desse processo, eu tenho dificuldades em fazê-la! Nesse caso eu precisava de uma lixa mais fina (uma 360 seria bom) e estava utilizando uma de 180. Eu não costumo montar toda a figura antes de pintar. Facilita demais pintar por partes.
Após a montagem eu magnetizei as peças, o que é uma tarefa super simples. Primeiro eu faço um furo guia utilizando uma broca pequena , após eu utilizo uma broca de 2mm para fazer o slot do imã. Aqui deve-se cuidar com a direção dos polos, procure sempre padronizar pois podemos trocar as armas entre outras figuras. Pra isso pode ser utilizada uma figura já pronta.
Depois de tudo pronto, as peças são colocadas em hastes de metal para termos onde pegar quando for aplicado o primer.
Primer da vallejo aplicado com aerógrafo, para a pintura da pele eu uso as cores padrões que venho utilizando nas outras figuras, no caso, faded kahki, bleached bone e elf flesh. A base é feita com faded kahki, seguido de um wash de agrax earthshade. Depois de seco é aplicado o highlight de faded kahki +bleached bone, bleached bone puro e bleached bone+elf flesh.
A asa da figura eu fiz com vomit brown e Vermin Brown. Tive que refazer os dedos utilizando pincel, pois utilizei aerógrafo e não vi uma maneira de isolar os dedos na asa.
Isolo as outras peças para pintar a carapaça, novamente segui a receita de army green, army green+camouflage green, camouflage green puro, camo green+desert yellow e desert yellow puro.
As armas eu utilizei hull red e blood red. Podemos utilizar Oxford blue + blood red para se fazer um shade, mas não utilizei nessas peças.
Ao remover a mascara, a tinta se soltou de alguns locais. Não saberia explicar os motivos, mas provavelmente foi a pressa de tirar rapidamente a mascara. Tive que reparar a área com pincel. Aqui eu encerrei o uso do aerógrafo.
Pequenos detalhes são pintados com o pincel, seguindo o esquema de cores utilizado anteriormente.
A figura já finalizada (utilizei superbonder para colar todas as partes).
Durante a confecção da base eu cometi um erro que me irriou bastante. Não consegui encaixar corretamente a peça no espaço que coloquei para a ela, e não consegui reparar direito. Os pinos que eu fiz não encaixaram direito nos furos que fiz na base, e pra nivelar coloquei greenstuff. E pra ajudar, em um momento de distração, eu furei o rabo do Tyrant com o drill!
Reparei o local com liquid greenstuff e repintei. Colei um pouco mais de areia para esconder o remendo que fiz na base e pintei de cinza utilizando pincel.
E ai está o Winged Hive Tyrant!
Abraço a todos e até o próximo artigo. Lembre-se que está é a quinta parte de uma série de artigos. Você pode clicar os links para conferir os artigos anteriores (parte 1, parte 2, parte 3 e parte 4).
-Vitor
